
Drawing content with StereoKit
Generally, the first thing you want to do is get content on-screen! Or in-visor? However it’s said, in this guide we’re going to explore the various ways to display some holograms!
At its core, drawing things in 3D is done through a combination of
Meshes and
Materials. A Mesh
is a collection of triangles in 3D space that describe where the
surface of that 3D object is. And a Material is then a collection
of parameters, Textures
(2d images), and Shader code that are combined to describe the
visual properties of the Mesh’s surface!
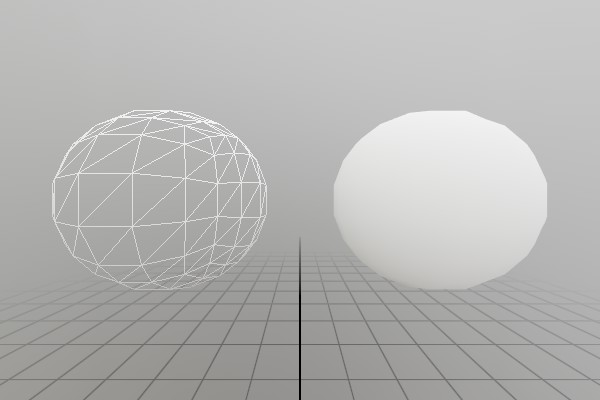 Meshes are made from triangles!
And in addition to that, you’ll need to know a little bit about
matrices, which are a math construct used to describe the location,
orientation and scale of geometry within the 3D space! A Matrix
isn’t difficult the way we’re using it, so don’t worry if math
isn’t your thing.
And then StereoKit also has a Model,
which is a high level combination of Meshes, Material, Matrices,
and a few more things! Most of the time, you’ll probably be drawing
Models loaded from file, but it’s important to have options.
Then lastly, StereoKit has easy systems for drawing Lines,
Text, Sprites
and various other things! These are still based on Meshes and
Materials under the hood, but have some complex features that can
make them difficult to build from scratch.
Meshes and Materials
To simplify things here, we’re going to use the built-in assets,
Mesh.Sphere
and Material.Default.
Mesh.Sphere is a built-in mesh generated using math when StereoKit
starts up, and Material.Default is a high performance simple
Material that serves as StereoKit’s default Material. (For more
built-in assets, see the Defaults)
Mesh.Sphere.Draw(Material.Default, Matrix.Identity);
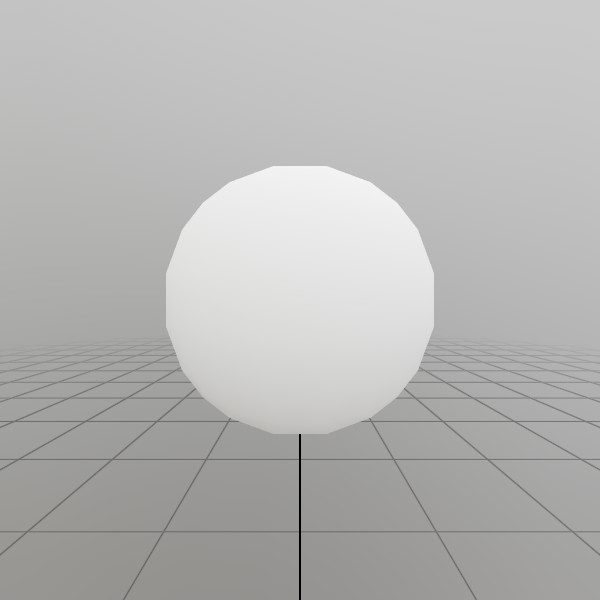 Drawing the default sphere Mesh with the default Material.
Matrix.Identity
can be though of as a ‘No transform’ Matrix, so this is drawing the
sphere at the origin of the 3D space.
That’s pretty straightforward! StereoKit will get this Mesh/Material pair onto the screen this frame. Remember that StereoKit is generally an immediate mode API, so this won’t show up for more than the current frame. If you want it to draw every frame, you’ll have to call Draw every frame!
So how do you get a Mesh to begin with? In most cases you’ll just be working with Models, but you can get a Mesh directly from a few places:
Mesh.Sphere,Mesh.Cube, andMesh.Quadare built-in mesh assets that are handy to have around.Meshhas a number of static methods for generating procedural shapes, such asMesh.GenerateRoundedCubeorMesh.GeneratePlane.- A Mesh can be extracted from one of a Model’s nodes.
- You can create a Mesh from a list of vertices and indices. This is more advanced, but check the sample here.
And where do you get a Material? Well,
- See built-in Materials like
Material.PBRfor high-quality surface orMaterial.Unlitfor fast/stylistic surfaces. - A Material constructor can be called with a Shader. Check out the Material guide for in-depth usage (Materials and Shaders are a lot of fun!).
- You can call
Material.Copyto create a duplicate of an existing Material.
Matrix basics
If you like math, this explanation is not really for you! But if
you like results, this will get you going where you need to go. The
important thing to know about a Matrix,
is that it’s a good way to represent an object’s transform (Translation,
Rotation, and Scale).
StereoKit provides a number of Matrix creation methods that allow you to easily create Translation/Rotation/Scale matrices.
// The identity matrix is the matrix equivalent of '1'. You can also
// think of it as a 'no-transform' matrix.
Matrix transform = Matrix.Identity;

// Translates points 1 meter up the Y axis
transform = Matrix.T(0, 1, 0);

// Scales a point by (2,2,2), rotates it 180 on the X axis, and
// then translates it up 1 meter up the Y axis.
transform = Matrix.TRS(
	new Vec3(0,1,0),
	Quat.FromAngles(180, 0, 0),
	new Vec3(2,2,2));

// To draw a cube at (0,-10,0) that's rotated 45 degrees around its Y
// axis:
Mesh.Cube.Draw(Material.Default, Matrix.TR(0,-10,0, Quat.FromAngles(0,45,0)));
The TRS methods have a lot of permutations that can help make your matrix creation code a bit shorter. Like, if you don’t need to add scale to your TRS matrix, there’s the TR variant! No rotation? Try TS! Etc. etc.
Now. Even more interesting, is that many Matrices can be combined
into a single Matrix representing multiple transforms! This is done
via multiplication, and an important note here is that matrix
multiplication is not commutative, that is: A*B != B*A, so the
order in which you combine your matrices is important.
This can let you do things like, rotate around a pivot point, or build a hierarchy of transforms! A parent/child position hierarchy can be described pretty easily this way:
Matrix parentTransform = Matrix.TR(10, 0, 0, Quat.FromAngles(0, 45, 0));
Matrix childTransform  = Matrix.TS( 1, 1, 0, 0.2f);

Mesh.Cube.Draw(Material.Default, parentTransform);
Mesh.Cube.Draw(Material.Default, childTransform * parentTransform);
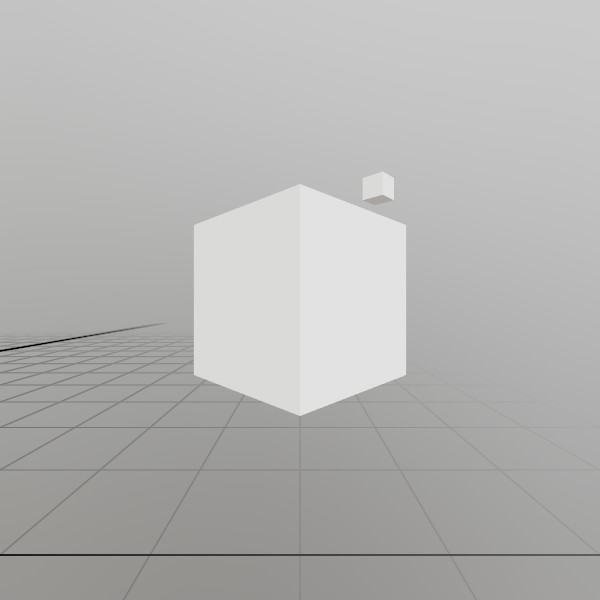 The smaller
 childTransform is relative to parentTransform via multiplication.
Models
The easiest way to draw complex content is through a Model! A Model is basically a small scene of Mesh/Material pairs at positions with hierarchical relationships to each other. If you’re creating art in a 3D modeling tool such as Blender, then this is basically a full representation of the scene you’ve created there.
Just put your 3D model in the project’s Assets folder, then load it like this once during initialization!
Model model = Model.FromFile("DamagedHelmet.gltf");
And since a model already has all its information within it, all you need to do is provide it with a location!
model.Draw(Matrix.T(10, 10, 0));
 StereoKit’s main format is the .gltf file.
So… that was also pretty simple! The only real trick with Models is getting one in the first place, but even that’s not too hard. There’s a lot you can do with a Model beyond just drawing it, so for more details on that, check out the 3D Asset guide!
But here’s the quick list of where you can get a Model to begin with:
Model.FromFileis the easiest, most common way to get a Model!Model.FromMeshwill let you create a very simple Model with a single function call.- The Model constructor lets you create an empty Model, which you can then fill with ModelNodes via
Model.AddNode - You can call
Model.Copyto create a duplicate of an existing Model.
Lines
Being able to easily draw a line is incredibly useful for
debugging, and generally quite practical for many other purposes as
well! StereoKit has the Lines
class to assist with this, and is pretty straightforward to use.
There’s a few variations, but at it’s simplest, it’s a few points,
a color, and a thickness.
Lines.Add(
	new Vec3(2, 2, 0),
	new Vec3(3, 2.5f, 0),
	Color.Black, 1*U.cm);
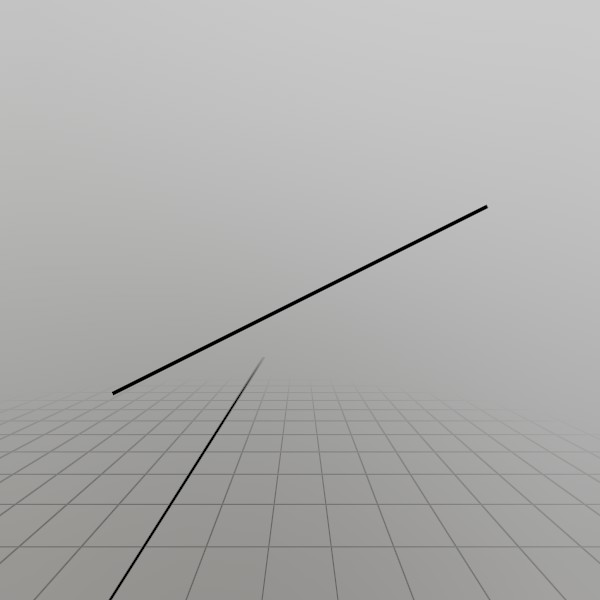 You can also draw Rays, Poses, and multicolored lists of lines!
Text
Text is drawn with a collection of rectangular quads, each mapped to a character glyph on a texture. StereoKit supports rendering any Unicode glyphs you throw at it, as long as the active Font has that glyph defined in it! This means you can work with all sorts of different languages right away, without any baking or preparation.
To draw text with the default Font, you can do this!
Text.Add("こんにちは", Matrix.T(-10, 10,0));
 ‘Hello’ in Japanese, I’m pretty sure.
You can create additional font styles and fonts to use with text
drawing, and there are a number of overloads for Text.Add
that allow you to change the layout or constrain to a particular
area. Check the docs for the method for more information about that!
Sprites
Drawing an image can be done in a few ways, the simplest being with
the Sprite class!
Much like a Model, you can load a Sprite at initialization from
a file! StereoKit supports most common image formats, and if you’re
looking to eke out some extra performance in your app, KTX2 images
include some extra features that can reduce load times and GPU
memory usage.
Sprite sprite = Sprite.FromFile("StereoKitWide.png");
Drawing is then the same as with a Model, but with some extra
options for placement, and automatic handling of the image’s aspect
ratio. Here we’re placing the center of the image at (0, 10, 0),
but we could just as easily place the top left of the image at
that position instead! The scale here is also equivalent to the
size of the image’s vertical axis, so this Sprite will be 0.5
meters tall.
sprite.Draw(Matrix.TS(0, 10, 0, 0.5f), TextAlign.Center);
![]()
If you already have a Tex with your image loaded, you can pretty
easily create a Sprite from it. One catch is that most of the
time with Sprites, you want the image to Clamp at the edges,
otherwise you may encounter a bit of bleed when the default Wrap
behavior wraps around the edges.
// Creating a sprite from a Tex
Tex logo = Tex.FromFile("StereoKitWide.png");
tex.AddressMode = TexAddress.Clamp;

Sprite sprite = Sprite.FromTex(logo);
If you want to draw your image with a custom Shader or Material
options, you’ll want to bypass the Sprite class and draw the
Tex manually! For this, we’ll want to set up our Material in a
way that mimics the Sprite’s behavior. Notably, it should support
transparency, and not cull backfaces to make it visible from
behind.
// In initialization, create a Material like this:

Tex logo = Tex.FromFile("StereoKitWide.png");
tex.AddressMode = TexAddress.Clamp;

Material spriteMaterial = Material.Unlit.Copy();
spriteMaterial.Transparency = Transparency.Blend;
spriteMaterial.FaceCull     = Cull.None;
spriteMaterial[MatParamName.DiffuseTex] = logo;
And then Draw it on a Mesh.Quad, manually accounting for the
image’s aspect ratio!
float aspect = logo.Width / (float)logo.Height;
Vec3  scale  = V.XYZ(aspect,1,1) * 0.5f;
Mesh.Quad.Draw(spriteMaterial, Matrix.TS(-30, 10, 0, scale));
Cool!
So that’s the highlights! There’s plenty more to draw and more tricks to be learned, but this is a great start! There’s treasures in the documentation, so hunt around in there for more samples. You may also be interested in the Materials guide for advanced rendering code, or the Model guide (coming soon), for managing your visible content!
If you’d like to see all the code for this document, check it out here!
Found an issue with these docs, or have some additional questions? Create an Issue on Github!